

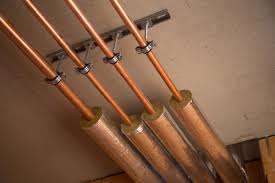
How to measure copper tubing correctly is the first and most critical step in any plumbing, HVAC, or DIY project. Cutting copper tubing without accurate measurements can lead to costly mistakes, wasted material, and frustrating delays. Imagine spending hours preparing a copper pipe only to realize it’s a fraction too short or too long — not only does it waste your time, but it also costs extra money to replace the material.
Copper tubing comes in various types, sizes, and wall thicknesses, each designed for specific applications. From residential water lines to commercial HVAC systems, precision ensures that fittings align perfectly, connections remain leak-free, and the entire system functions safely and efficiently. Even a minor miscalculation can result in improperly fitted joints, uneven bends, or unstable installations.
This guide will teach you how to measure copper tubing accurately and confidently. Whether you’re a professional plumber or a DIY enthusiast, we’ll cover the essential tools, step-by-step measurement techniques, and common mistakes to avoid. By following these best practices, you’ll save time, reduce material waste, and ensure that your copper pipe installations are durable, safe, and professional-quality.
Accurate measurement isn’t just about avoiding mistakes — it’s about maximizing efficiency and achieving long-lasting results. With the right approach, even a first-time installer can cut copper tubing perfectly, make precise bends, and fit the right connections every time. This human-touch approach emphasizes planning, checking, and double-checking measurements to prevent errors before they happen.
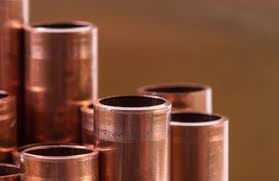
Understanding Copper Tubing Sizes
When it comes to working with copper tubing, understanding copper tubing sizes is essential for a successful project. Choosing the wrong size can lead to ill-fitting connections, leaks, and wasted material. Whether you’re a professional plumber or a DIY enthusiast, knowing the differences in tubing types, diameters, and wall thickness ensures accuracy and efficiency.
Standard Types of Copper Tubing
Copper tubing is categorized into four standard types, each designed for specific applications:
- Type K – The thickest-walled tubing, Type K is ideal for underground water lines or areas requiring high durability. Its robust construction makes it resistant to pressure and corrosion.
- Type L – Slightly thinner than Type K, Type L is commonly used for residential plumbing and HVAC systems. It balances durability with flexibility, making it easier to bend for installation.
- Type M – Thinner than Types K and L, Type M is suitable for indoor water supply lines where pressure is moderate. While more affordable, it is not recommended for high-pressure applications.
- DWV (Drain, Waste, Vent) – Designed specifically for drainage systems, DWV tubing has the thinnest walls since it does not carry pressurized water. It is ideal for sinks, toilets, and vent lines.
Understanding Copper Pipe Diameter
When measuring copper tubing, you’ll encounter terms like OD (Outer Diameter), ID (Inner Diameter), and wall thickness. Each plays a crucial role in choosing the right tubing:
- Outer Diameter (OD): This is the total width of the tube, including its wall. OD is important when fitting tubing into connectors, clamps, or sleeves.
- Inner Diameter (ID): ID measures the hollow portion inside the tubing. It affects flow rate, pressure, and the type of fittings required.
- Wall Thickness: The difference between OD and ID determines the wall thickness. Thicker walls mean more durability and pressure resistance.
For example, Type K has thicker walls than Type M, even if the OD is the same, which allows it to handle higher pressures safely. Understanding these measurements ensures you choose tubing that fits properly and functions reliably.
Practical Tip for Accuracy
Always measure your copper tubing before cutting. Use a caliper or precise tape measure to check OD and ID if fittings or connectors are involved. Double-checking these measurements ensures the tubing will fit perfectly in your project, avoiding costly mistakes.
Human touch: A small oversight in measuring copper tubing can lead to wasted material or fittings that don’t fit. Spending a few extra minutes verifying your measurements pays off in time saved and frustration avoided.
Tools You’ll Need for Accurate Measurement
Accurate measurement is the cornerstone of any successful copper tubing project. Even small errors can lead to ill-fitting pipes, leaks, or wasted material. Using the right tools ensures that every cut is precise and every connection is secure. Here’s a detailed guide on the essential tools for measuring copper tubing and how they help avoid costly mistakes.
1. Tape Measure or Ruler
A tape measure or a simple ruler is your most basic tool, but it’s also one of the most important. These tools help you determine the length of copper tubing you need for your project.
Why it helps:
- Ensures you cut the exact length required for your plumbing or HVAC installation.
- Reduces material waste by preventing overly long or short cuts.
- Easy to use for both beginners and professionals.
2. Caliper or Micrometer
For precise measurement of diameters, a caliper or micrometer is essential. While a tape measure gives a rough estimate, these tools allow you to measure both the outer diameter (OD) and inner diameter (ID) accurately.
Why it helps:
- Ensures proper fitting with connectors, elbows, and clamps.
- Prevents mismatched tubing sizes that could cause leaks or pressure issues.
- Particularly useful when working with multiple types of copper tubing (Type K, L, M, or DWV).
3. Marker or Pencil
A good-quality marker or pencil is essential for marking where you’ll make cuts or bends.
Why it helps:
- Provides a clear visual reference for precise cutting.
- Reduces errors caused by guesswork or freehand cuts.
- Works well with measuring tools to transfer exact measurements onto the copper tubing.
4. Optional: Pipe Cutter for Test Cuts
While not strictly a measuring tool, a pipe cutter can be extremely helpful for test cuts to ensure accuracy before cutting the final piece.
Why it helps:
- Confirms that your measurement and marking are correct.
- Reduces the risk of ruining your main tubing piece.
- Helps practice smooth, clean cuts, especially if you’re new to working with copper.
Having the right tools for measuring copper tubing is just as important as knowing the correct size or type of tubing. A tape measure, caliper, marker, and optional pipe cutter together ensure accuracy, reduce waste, and make your project smoother and safer. Taking a few extra minutes to measure carefully with proper tools saves time, money, and frustration in the long run.
Step-by-Step Guide: How to Measure Copper Tubing
Accurate measurement is the foundation of any copper tubing project. Whether you’re installing plumbing, HVAC lines, or DIY copper tubing systems, precise measurement ensures proper fit, prevents leaks, and saves money. Here’s a detailed, step-by-step guide to measuring copper tubing accurately.
1. Measure Length
The first step is determining the total length of tubing needed for your project. Use a tape measure or a ruler for this purpose.
How to do it:
- Place the copper tube along the intended path or layout.
- Measure the distance from start to finish, accounting for bends or corners.
- Add a small allowance for fittings and connections.
Why it matters: Correct length prevents the frustration of coming up short or wasting excess tubing.
2. Measure Outer Diameter (OD)
Next, use a caliper to measure the outer diameter (OD) of the tubing. OD is critical because it determines the compatibility of fittings, clamps, and connectors.
Steps:
- Open the caliper jaws and place them around the widest part of the tube.
- Read the measurement carefully, noting fractions of millimeters or inches.
Tip: Measure in more than one spot along the tube to ensure uniformity — some tubes may slightly vary.
3. Measure Inner Diameter (ID) (If Needed)
While OD is usually sufficient for most applications, measuring the inner diameter (ID) may be necessary for flow calculations or precise fittings.
How to measure:
- Use a micrometer or refer to a standard wall thickness chart if you know the tubing type (Type K, L, M, or DWV).
- ID = OD – (2 × wall thickness)
- Human touch: Knowing the ID ensures the proper flow rate and avoids problems in pressurized systems, like water supply or HVAC.
4. Mark and Double-Check
Once you have your measurements, mark the tubing with a pencil or marker where cuts or bends will occur.
Steps:
- Use a ruler or straight edge to mark a precise line.
- Double-check the measurement before cutting.
- Ensure markings are clear and visible.
Human touch: A quick double-check can save hours of frustration and extra material costs. Even small mistakes in measurement can result in wasted tubing and fittings.
5. Tips for Accuracy
To improve your accuracy:
- Account for fittings and connectors: Include extra length for soldering, compression, or overlap.
- Consider bends: Tubing bends reduce effective length, so measure with curves in mind.
- Measure multiple times: Verify each measurement twice before cutting.
- Use proper tools: A quality tape measure, caliper, and marker reduce human error.
- Human touch: “A little patience in the measuring stage ensures the project flows smoothly from start to finish.”
Common Mistakes to Avoid
Even experienced plumbers can make errors while measuring copper tubing. Avoid these common pitfalls:
1. Measuring Only the Inside Diameter and Ignoring OD
Focusing solely on ID can lead to:
- Ill-fitting connectors
- Loose or tight connections
- Leaks and pressure issues
Tip: Always measure OD first to ensure fittings and sleeves match.
2. Not Accounting for Wall Thickness
Copper tubing comes in different types (K, L, M, DWV) with varying wall thicknesses. Ignoring this can result in:
- Misaligned joints
- Pressure drop or flow issues
- Wasted fittings
3. Cutting Before Confirming Total Length
One of the most common mistakes is cutting the tubing without verifying measurements along the intended path. Consequences include:
- Tubing too short for connections
- Excess material waste
- Rework or additional purchases
Tip: Always measure the full run, including allowances for fittings, before making the final cut.
Additional Tips for Success
- Use test cuts: If you’re new to copper tubing, practice on a scrap piece to confirm your technique.
- Mark clearly: Use a permanent or easily visible marker to reduce mistakes.
- Consider expansion/contraction: For HVAC or outdoor projects, allow slight adjustments for temperature changes.
- Keep tools calibrated: A well-maintained caliper or micrometer ensures measurements are precise.
Measuring copper tubing accurately is critical for plumbing, HVAC, and DIY projects. By following these copper pipe measurement steps, using the proper tools, and avoiding common mistakes, you can ensure perfect cuts, secure fittings, and efficient installations.
Remember, precision in the measuring stage saves time, reduces material waste, and prevents costly errors. A quick double-check before cutting can save hours of frustration and extra expenses, making your copper tubing project smooth, safe, and professional.
FAQ
1. Why is it important to measure copper tubing accurately?
Accurate measurement prevents wasted material, ill-fitting joints, and leaks. It ensures plumbing, HVAC, or DIY projects are safe, efficient, and professional-quality.
2. What tools do I need to measure copper tubing?
The essentials include a tape measure or ruler, calipers or micrometer for precise diameters, a marker or pencil, and optionally a pipe cutter for test cuts. Using the right tools reduces errors and saves time.
3. How do I measure the outer diameter (OD) of copper tubing?
Use a caliper to measure the widest part of the tube. OD is crucial for selecting compatible fittings and connectors. Always check in more than one spot for uniformity.
4. Should I measure the inner diameter (ID) as well?
Measuring ID is helpful for flow calculations and precise fittings. It can be measured using a micrometer or calculated by subtracting twice the wall thickness from the OD.
Tips for Different Applications
Accurate measurement of copper tubing is not a one-size-fits-all task — different applications require specific considerations.
Plumbing: Always allow extra length for soldering and fitting gaps. Proper allowances prevent leaks and ensure joints are secure, especially in water supply lines.
HVAC: Account for bends, coils, and expansion. Copper tubing in heating and cooling systems often twists and turns, so measuring along the intended path ensures the tube reaches every connection without stress.
DIY Projects: Whether installing LED lighting, water features, or home workshops, consider end fittings and connectors. Proper planning prevents frustration and ensures smooth assembly.
Final Thoughts & Call to Action
Accurate measurement is the backbone of any successful copper tubing project. Investing in proper tools and following a systematic approach ensures long-term precision, safety, and efficiency.
Ready to cut copper tubing like a pro? Follow these steps for perfect measurements every time and avoid wasted material or ill-fitting joints. Accurate measurement saves time, money, and frustration — whether for plumbing, HVAC, or DIY projects.